Monday, August 13, 2012

Custom Engine Cover (fiberglass) - 11th August 2012

I went to paint supply shop and bought a starter kit for fiberglass work.

For RM26 (USD8.30) i get:
- 4 sq feet of fiberglass sheet (mesh)
- 1/2 kg of resin


using my old thin, stretchable t-shirt, i cut it into 1 big sheet and arranged it to the fuel tank. I'm using double-sided tape to stick it to the tank lower wall.
This is how it look like

Rear side view of the cloth

As u can see, a layer of double sided tape to make the cloth sticking into the curve

The cloth pressed to the tape, u can see the shadow of the curve.

Front view, the bottom part of the cloth was sticked to the custom zinc cover i made in the previous entry

Resin applied onto the cloth

Wet resin, rear side view

Wet resin


I left the project for 1 night to let it totally dry, this is how it look like the next day (12th August 2012)
The resin has harden and stay in it shape

Hardened resin, inner look, as u can see, some paint stuck on it, i have to repaint the tank and body frame

Cutting the unused part, the balance of the cloth.

Fitting test, very good result, 99% fits.

Fitting test #2, full side view

Cutting the fiberglass mesh into strips

Reapply the resin for fiberglass layering

After fiberglass layering, it become harder and sturdier, i'm running out of resin, have to stop until the next update

Monday, August 6, 2012

Cleaning the engine's outer parts - 5th August 2012

This time, i'm asking my friend, Aliff, for his help to do this part since i can't do all these by myself of thing gonna be so slow. But the progress currently already crawling slow. What do you expect from an IT guy (my full time job is an IT technician) when he go for mechanic job. Thx mate for the help.


Frame spraying - 4th August 2012

Since i got another free weekend, i cont the next step, painting the frame.

This is how the frame look like after paint stripping and sanding job, not really tidy.

My equipments, spraying gun, ciggarette, lighter.. hahahaha

My dad's carving stuff filling the whole working area, so i have to do the spraying outside the normal area..

My backyard view..

------------------------------------------------------------------------------------------------------------
Undercoating
Grey undercoat..
 ------------------------------------------------------------------------------------------------------------
Base color - Dark Silver/Gold


--------------------------------------------------------------------------------------------------------------
Clearcoat Layer - Aikka V10 (same as fuel tank clearcoat)


Monday, July 30, 2012

Spraying Job for fuel tank - 29th July 2012

Early in the morning i wake up, gathering every required equipments and doing some weather forecasting, and it seems that today gonna be a good sunny day.

Starting with undercoat, i'm using grey because that's what i have in my stock, don't wanna spend more.
1st layer of undercoat

My beloved spray gun, just bought it last month. Running on 2hp air compressor.

2nd/final layer of undercoat

Some cigarettes and coffee while waiting for the layers to dry

Forgot to take photo while doing base color, this is the 1st layer of clear-coat.

Since i dont have a proper spraying room, i have to cover it using a big basket to avoid those flying insects "transiting", this is after 2 layers of clear-coat.

The end result, this is how it look after complete dry.

More photo on completion.

Moaaarrr!!

This is the clear-coat i used.

Friday, July 27, 2012

Stripping job part 2 - 27th July 2012

I have another hour to spend today so i continue on stripping the paint on fuel tank.. This time i do it slowly and following the correct order.. Some parts are stubborn enough which need 2 - 3 extra layer.


This is the final look after sanding.. quite troublesome but the satisfaction is worth the hard work...

Spraying job in next update..

Paint stripping - 26th July 2012

Hello again everyone, on the 25th, i went to a hardware store and bought a can of Paint Stripper. This is my 1st time using it and damn, didnt know it will hurt so much if the chemical contacted skin. i think i ran to tap water for every 15 - 30 seconds to wash, the pain is unbearable even juz a small dot dropped on my skin.

As u can see from the picture, not much of a success can be said, only some of the paints removed, some still sticking strong on the metal parts. It is due to my wrong step in applying the paint stripper. Stupid me, i only check the manual on the internet after encounter the problem, not before using it.

The right step is:
1] apply paint stripper using brush
2] wait for 10 - 20 mins for the paint to start peeling off
3] scrap the paint using scrapper
4] wash with water to neutralize the chemical

But what i did was:
1] apply paint stripper using brush
2] wait for 5 mins (after i saw a little sign of peeling, over excited)
3] wash to neutralize the chemical
4] scrap the paint (this is useless bcoz after washing, the paint harden)

These pic are showing some of the progress, cant do much due to working days, next update gonna be this weekend.

The paint stripper, RM 15.50, should be around USD 4.80


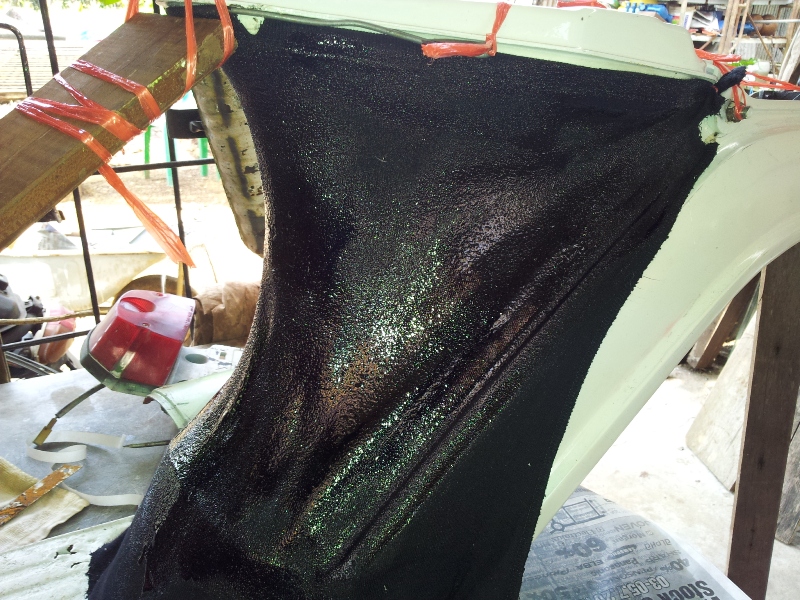
Peeling paint after chemical application

Some of the success attempt. Need to rework to strip-off the remaining.

Monday, July 16, 2012

Tearing it apart - 15th July 2012

Yesterday, i wake up early and have nothing to do, only waiting for 4pm to go to Rainforest World Music festival. So i spent a little time dismantling the scooter, getting ready for paint removal, sanding and spraying.


End of update, will see if i have more time later and start working on it..